Showing posts with label DIY. Show all posts

Thursday, August 16, 2012

Learning about Blogging


While I slave away, my "co-worker" has bailed on me.

Go figure.


So I've been reading about some SEO (search engine optimization, yes I had to look it up) techniques from The North Carolina Cowgirl.  Professional SEO Consultant and a blogger that I found through one of my favorite blogs Peanut Butter Fingers, who also posted some good tips on her blog.

So I started working with Pic Monkey yesterday. (That's where the little conversation bubbles have come from.)  It is super easy to load a pic and get it just right for posting.  And can be done from ANY computer, which is a plus for me.  If you look at the Peanut Butter Fingers link you can see some of what can be done with this site.  It is free...but the cooler stuff requires membership.  Free is fine for me now.


So then I tried to learn how to add a "Pin It" button on my site.  That took a couple of days to get the hang of it and I'm still wondering a bit....?


I guess after I publish this I'll find out if it worked!

The last thing I've done so far is to add a XML Sitemap.  I definitely had to look that up too and see what it was all about but I did find out how to do it here.  This is one of those things that I still don't know a lot about and I'm not sure how to judge if it is working or not.  It is basically supposed to allow the search engines to bring up more that your last 26 posts. (See I didn't even know that was the case, but I guess it is with blogger.)  So there you go.  I hope this helps!


Friday, June 22, 2012

Two Words - YARN GIVE-A-WAY


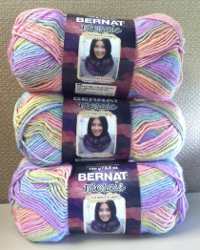
Bernat Mosaic Yarn: Daydream
Gifted By: Bernat
Reviewed By: Jeanette Benoit, Editor for AllFreeCrochet.com
"Mosaic yarn from Bernat is a great yarn to work with. It offers a fabulous self striping look that creates amazing effects. This yarn has a beautiful shade range which is great for garments or home decor.
It is available in a variety of different colors, including my personal favorite, Daydream.  This soft pastel color is perfect for spring and summer patterns, as well as baby blankets.  Use this gorgeous yarn to make an unforgettable baby shower gift for a special friend.  The variety of colors makes it suitable for both baby boys and baby girls.
Not only is this yarn extremely soft and easy to work with but it's also easy to care for, as well.  This 100% acrylic yarn is machine washable and dryable."

Ain't it purty?  Would you like to win some???  Follow this link!

Wednesday, February 8, 2012

Still Alive Over Here!

It has been 2 whole months since I've posted in my blog.  One big reason...it's Winter Texan season!!!  For those of you who do not know, I live in an RV park and during the Dec-Mar season the park is FULL of northerners trying to get away from the cold weather...can you blame them?  So I lead several classes, including: Yoga, Aerobics, Strength Training, Belly Dance, Line Dance, Crafts, Wii Competitions and what ever else I can come up with to keep everyone active, mind and body!

So I have been VERY busy with classes!  One of my most time consuming classes is crafts.  I teach it once a week and I typically have to find the project, get supplies, test it out, get enough supplies for everyone and then teach the class. Some are fairly simple but some are soooo time consuming!  This week we made Trellis Necklaces.  So pretty, but cutting out 50 of them was tiring.

I LOVE new ideas, if you have any send them my way!!

Something I've finished in between classes....sorry about the CRAPPY pictures!


Tuesday, December 6, 2011

Handmade Gift Exchange Linky Party!

It's that time!!  The time where all the handmade gifts are finally in their new owners hands.  Now we all want to share our new items so we've been busy taking pictures and uploading them in a linky party!   It is so exciting to rummage through all the links and see what people have come up with.  You can browse too just visit this this link to Craftaholics Anonymous.

First I want to show you what I gave to my partner.  She loves lots of colors just like I do so I thought it would be fun to put a little spring in her kitchen during these short winter days.


A lime green Wash Blossom (dish cloth), a bright pink ChrysanthePad (hot pad or trivet) and a bright blue Scrub Bud (pot scrubber).  The wash cloth and hot pad are both made with 100% cotton.  The pot scrubber is 100% nylon and works GREAT on pots, rough feet and getting the grim off your precious tire rims!

Now for my gift! :)  My partner did great at reading between the lines of our email conversations and picked up on the fact that I teach yoga.  So she gave me a yoga mat carrier, with POCKETS!!  I think the pockets are so cool because you can fit your yoga belt, keys, lip gloss, drivers license; all together in one and head to class.  How AWESOME is that??  Check it out!
Ready for class!

Check out the pockets...ALL THE WAY AROUND!
And you can see the pretty green material on the inside...super classy.

It was a hit!
I love the colors and just the idea that it's handmade.  I mean really...who would have thought to make a yoga mat bag??  MY PARTNER, THAT'S WHO!  Kudo's to my partner Jody...best handmade, surprise gift EVER!

Have you ever participated in a gift exchange for someone you didn't know?  If not I suggest you do!

Friday, November 4, 2011

2011 Handmade Gift Exchange

This looks like so much fun!  Hurry up, sign up ends Nov 7th, 2011!!

Monday, October 3, 2011

Prayer Shroud for Pastor Terry Bullock

I know it has been FOREVER since I posted so I thought I would start with a custom project I did for a dear friend of ours.  He had placed a request on facebook for someone with sewing experience to make a prayer shroud for him with maybe a little embroidery on it.  Since I am NOT the sewer so much I offered to embroider if anyone wanted to do the sewing part.  After a time with no responses I offered to crochet a border on a piece of muslin material. 

So I began with this....
After some trial and error at exactly how I was going to accomplish such a feat.  I say that because I've never done a crochet edging on material before and I really wasn't sure how to go about it.  That first row seemed to take forever but once I got a good rhythm going it wasn't so bad.


Some details of the edging.


It turned out to be about 36 inches wide and about 63 inches long.  I found that the corners curled a bit more than I liked but other than that it is absolutely beautiful! ....if i do say so myself ;)  I will definitely be up for making more and can't wait to try this technique on a fleece blanket!!  Ya want one??  Send me a message and we can design something together!

I've completed so many projects for the grandbaby that I need to put up but we're in the process of packing up to head for Texas.  Much more to come though...stay tuned!


Friday, November 19, 2010

Retro Ruffle Scarf - FREE PATTERN

Getting My Retro On!

This is the first pattern I've ever written down!  Whew...glad that's over!  I enjoy creating new things but not real sure I like the writing down part of it.  I'm sure there's some sort of trick or technique to creating and writing a pattern at the same time...if you know of one please share!

If you think the colors look familiar then you might have seen them at Scarves for Special Olympics.  I had mentioned this in one of my earlier posts.  These are the official colors this year and I thought I'd not only get creative but actually try and write it down in case I ever wanted to do it again.  Actually I find myself being one of those people that will do a pattern once and not have any desire to do it again.  Of course if you really want one in specific colors my arm can be twisted!

I hope you enjoy...and if you find an error (if you don't I'd be surprised) please let me know!!!

Color A - Red Heart Super Saver 886 Blue
Color B - Red Heart Super Saver 512 Turqua

Large Circle - make 8
Begin with Color A
ch 2
Rw1 - 6 sc in second ch from hook, slst in first sc to join, ch 1 do not turn (6 sc)
Rw2 - 2 sc in each sc around, changing to Color B slst in first sc to join, ch 1 do not turn (12 sc)
Rw3 - *2 sc in first sc, 1 sc in next sc* repeat around, slst in first sc to join, ch 1 do not turn (18 sc)
Rw4 - *2 sc in first sc, 1 sc in next 2 sc* repeat around, slst in first sc to join, ch 1 do not turn (24 sc)
Rw5 - *2 sc in first sc, 1 sc in next 3 sc* repeat around, changing to Color A slst in first sc to join, ch 1 do not turn (30 sc)
Rw6 - *2 sc in first sc, 1 sc in next 4 sc* repeat around, chainging to Color B slst in first sc to join, ch 1 do not turn (36 sc)
Rw7 - *2 sc in first sc, 1 sc in next 5 sc* repeat around, slst in first sc to join, fasten off (42 sc)

Small Circle - make 9
Begin with Color B
ch 2
Rw1 - 6 sc in second ch from hook, slst in first sc to join, ch 1 do not turn (6 sc)
Rw2 - 2 sc in each sc around, slst in first sc to join, ch 1 do not surn (12 sc)
Rw3 - *2 sc in first sc, 1 ch in next sc* repeat around, changing to Color A slst in first sc to join, ch 1 do not turn (18 sc)
Rw4 - *2 sc in first sc, 1 sc in next 2 sc* repeat around, changing to Color B slst in first sc to join, ch 1 do not turn (24 sc)
Rw5 - *2 sc in first sc, 1 sc in next 3 sc* repeat around, slst in first sc to join, fasten off (30 sc)

Connect alternating circles end to end using Color B to sew through 3 stiches on each end.

Close up of "valley" where two circles meet.
Edging
Rw1 - With Color B sc all the way around the edge of the scarf.  On each end do 2 sc in the same st. changing to Color A slst in the first sc to join, ch 1 do not turn.
Rw2 - sc all the way around the edge of the scarf.  At each valley where the circles join, sctog in the last sc from one circle and the first sc on the next circle from the previous row.  On each end circle do 2 sc in the same st at the 3 o'clock and 9 o'clock position. Slst in the first sc to join, ch 1 do not turn.
Rw3 - 2 sc in each stitch all the way around, skipping the sctog at each valley from previous row.
Fasten off and weave in all ends.


Retro Ruffles!

Tuesday, November 2, 2010

Crochet A Good Cause


One of my goals in my blog is to talk about what I'm currently working on.  But...since my current creation is a gift I have to wait until I give it away before I talk about it....don't worry, I'm taking pictures as I go!  So since I can't talk about that...I've chosen to talk about crocheting for a cause.  As many of you know my birthday was a couple of weeks ago.  Joe and I spent the day by the beach and when I got home I had this beautiful bag along with some hand picked flowers from some of the neighborhood kids.
Costa Rican Messenger Bag

Well I could immediately tell that this bag had been crocheted.  But out of what?  It was pretty stiff and felt almost plastic.  Upon further research I found out that it was indeed plastic, recycled grocery bags to be exact...AND a portion of it's purchase price went to help a Leatherback Conservation Project in Costa Rica.

Ain't he cute?

Not only did it help the leatherback but it also helped the Sea Turtles at Sea Turtle, Inc. right here in South Padre Island, TX!  According to their website these bags are created with approximately 80 plastic grocery bags.  Finding a use for these bags keep them out of our oceans and landfills thus helping to keep them away from wildlife where they can accidently harm themselves.  The women of Costa Rica crochet these bags, and are paid a fair wage thus helping not only the turtles but their family as well.

There are so may ways that we can use the craft of crochet to help our world.  Here are just a few I found:

Scarves for Special Olympics - You will see another post from me when I finish my contributions!

You can upcycle and recycle just about anything you can put your mind to...find something that you are passionate about and let your creativity be your guide.  God gave us our gifts to share...I can't think of a better way than to help others...can you?

Some more birthday shots for you...

My new tire cover...Life IS Good!!
Toes in the sand...just like we like 'em!

Thursday, October 14, 2010

T-Shirt No Braiding - Braided Rug


I have finally forced myself to finish my t-shirt rug I started last February. I really have no excuse as to why I just stopped but I did. Threw it along with the balls of t-shirt fabric under the couch and forgot about it...until yesterday. I was unpacking from our recent move to south Texas and found this long forgotten project under my couch. (If you are unfamiliar with RVs, I have a futon-like couch that allows me storage space underneath...not a lot of storage and not easy to get in or out of but works perfect to stuff yarn and other craft project inside...thus also working to store some of my wall hangings in the softness of the yarn while traveling.)


I taught a class on making rugs out of strips of fabric, I just chose to use my husbands old T-shirts. At the rate he goes through them I could probably make one for every RV in the park! This particular rug has 6 shirts in it. When I started this rug I wasn't blogging and didn't even thing about taking pictures and explaining how to strip a shirt so that it is all one piece and not a bunch of strips you'd then have to sew together....oh well, maybe next time!


There are so many ways to make a "braided" rug. For a traditional braid you would make thin strips then braid them together. Once you have sufficient braid you would just start to roll it into the shape you want, tacking it together with needle and thread as you go. That seemed like more work to me so I choose to crochet mine. I used the largest hook I could find, mine is a Q, and began chaining. The more chains you do the longer and skinner your rug will be, the less the shorter and fatter it will be...with the same amount of material of course. If you want it round just chain two and work an even number of single crochet (sc) into the 2nd chain from hook. Once I had my chain, I did a slip stitch (ss) into the back loop only all the way down both sides with 3 in each end for increasing purposes. And I just kept going around and around. If your work begins to curl just add a couple extra ss evenly around the piece of work and it will lay down.


Don't ever be afraid to rip something out. Yes I know you put a lot of work into it but if it's not right, and it is obvious, then it needs to be fixed! With practice you will find yourself ripping out much less often. And if you don't rip it out and fix it, every time you look at your piece all you will see is that flaw and not the beauty you created with your own two hands. Enjoy!